
Bootstrap Studio Beginner’s Guide: How to Build Responsive Websites Without Complex Coding 2026
Building a professional website can feel difficult when you are new to web development. You may need to understand HTML, CSS, JavaScript, responsive design, layouts, hosting, and many other technical concepts. Bootstrap Studio makes this process easier by giving you a visual environment where you can design responsive websites using drag-and-drop tools.
Bootstrap Studio is especially useful for beginners, freelancers, designers, students, and developers who want to build modern Bootstrap websites more efficiently. It combines visual website design with access to real HTML, CSS, and JavaScript, allowing you to work visually while still learning how websites are structured.
This beginner’s guide explains what Bootstrap Studio is, how it works, its main features, and how you can use it to create your first responsive website.
What Is Bootstrap Studio?
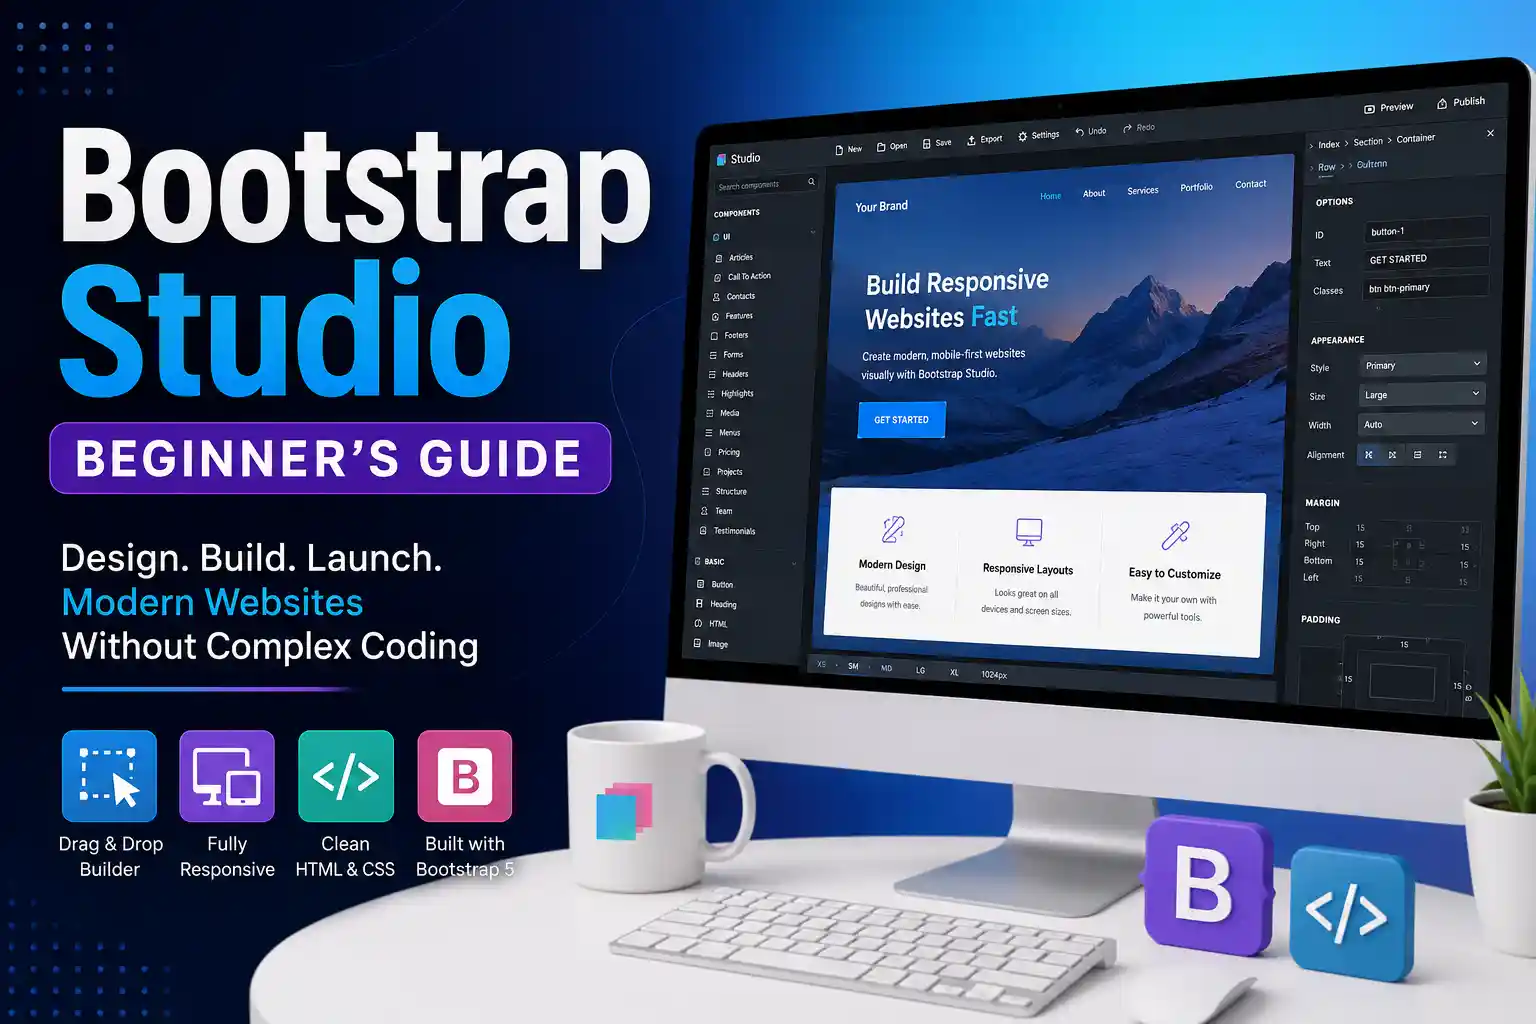
Bootstrap Studio is a desktop application for designing and building responsive websites. It is based on the Bootstrap framework, one of the most popular front-end frameworks used in web development.
Bootstrap provides ready-made layout systems, buttons, navigation bars, forms, cards, alerts, modals, and other website components. Bootstrap Studio gives you a visual interface for using these components without manually writing every line of code.
Instead of creating a page entirely from scratch, you can drag components onto the design area, customize their appearance, and arrange them into a complete website. The software then generates the HTML and CSS required for the design.
However, Bootstrap Studio is not only a simple website builder. You can also add custom HTML, write your own CSS, include JavaScript, import external libraries, and export the finished website files. This makes it suitable for beginners as well as more experienced developers.

Why Use Bootstrap Studio?
The main advantage of Bootstrap Studio is that it helps you create websites faster. Writing every section manually can take a long time, especially when you are still learning web development.
With Bootstrap Studio, you can start with pre-built components and customize them according to your project. This reduces repetitive work and helps you focus on the website’s design, content, and user experience.
The visual editor also makes it easier to understand how Bootstrap layouts work. You can see how containers, rows, columns, spacing classes, and responsive breakpoints affect your website in real time.
Another major benefit is that Bootstrap Studio creates real website files. After completing your project, you can export the HTML, CSS, JavaScript, images, and other assets. These files can then be uploaded to most standard web hosting services.
Understanding the Bootstrap Studio Interface
When you open Bootstrap Studio, the interface may initially look complicated. However, the main sections are easy to understand once you know what they do.
The central area is the design canvas. This is where you can preview and edit the webpage you are building. You can click elements directly on the page to select and modify them.
The component panel contains elements that you can add to your project. These include headings, paragraphs, images, buttons, forms, navigation bars, cards, containers, rows, columns, and many other components.
The overview panel shows the structure of the current page. It works like a visual representation of the HTML document. You can use it to select nested elements, reorganize sections, and understand how the page is structured.
The options and appearance panels allow you to customize selected components. You can change text, links, color's, spacing, alignment, visibility, sizing, and responsive behavior.
There are also editors for CSS, JavaScript, HTML, fonts, images, and other project resources.
Creating Your First Project
To begin, open Bootstrap Studio and create a new design. You can choose a blank project or start with a template.
A blank project gives you complete control over the design. It is a good choice when you want to practice building a page from the beginning.
Templates are useful when you want a faster starting point. They may already include sections such as navigation menus, hero areas, service cards, testimonials, contact forms, and footers.
After creating the project, add a container to the page. Bootstrap containers help control the width and alignment of your content. Inside the container, you can add rows and columns to create your layout.
For example, you could create a row with two columns. The left column could contain a heading and text, while the right column could contain an image. This is a common layout for homepage hero sections.

Using Bootstrap Components
Bootstrap Studio includes a large collection of built-in components. These components can be dragged directly into your page.
Some commonly used components include:
- Navigation bars
- Buttons
- Cards
- Forms
- Images
- Tables
- Alerts
- Progress bars
- Accordions
- Carousels
- Modals
- Breadcrumbs
- Pagination
Each component comes with Bootstrap styling and behavior. For example, a navigation bar can automatically adapt to smaller screens, while a modal can open a popup window when a button is clicked.
After adding a component, you can change its content and styling through the available options. You can also apply Bootstrap utility classes for margins, padding, text alignment, display settings, color's, and positioning.
Building Responsive Layouts
Responsive design means creating a website that works properly on desktops, tablets, and mobile phones. Bootstrap Studio makes this easier by using Bootstrap’s responsive grid system.
The grid system is based on containers, rows, and columns. A row can contain up to 12 column units. You can decide how much space each column uses at different screen sizes.
For example, two columns could each use six units on desktop screens, placing them side by side. On smaller screens, each column could use all 12 units, causing them to appear one above the other.
Bootstrap Studio allows you to preview your website at different screen widths. This helps you identify problems such as oversized text, overflowing images, narrow buttons, or poorly arranged columns.
You should regularly test the design at mobile, tablet, laptop, and desktop sizes while building your website.
Customizing Your Website with CSS
Although Bootstrap includes many built-in styles, most websites need some customization. Bootstrap Studio includes a CSS editor where you can create your own styles.
You can use custom CSS to change color's, fonts, backgrounds, borders, shadows, animations, spacing, and other visual details.
For example, you might create a custom class for a hero section with a dark background and large vertical padding. You can then apply that class to the relevant section through the interface.
Beginners should avoid editing Bootstrap’s original files directly. It is better to create a separate custom stylesheet. This keeps your changes organized and makes the project easier to maintain.
Using clear class names is also important. Names such as `.hero-section`, `.service-card`, and `.contact-button` are easier to understand than unclear names such as `.box1` or `.style2`.
Adding Images, Fonts, and Icons
Bootstrap Studio includes resource management tools for images, fonts, icons, CSS files, and JavaScript files.
You can import images into the project and use them throughout the website. Before importing large images, compress and resize them to improve loading speed.
The software also supports web fonts, allowing you to give your website a more professional appearance. Choose fonts that are readable and use a consistent typography system across headings, paragraphs, buttons, and navigation links.
Icons can be useful for service sections, contact information, buttons, and feature lists. However, avoid adding too many decorative icons, as they can make the design look cluttered.
Adding Custom HTML and JavaScript
As your skills improve, you may want to add features that are not available as standard components. Bootstrap Studio allows you to insert custom HTML blocks and write JavaScript.
Custom HTML can be useful for embedding external tools, adding specialized markup, or creating unique page structures.
JavaScript can be used to create interactive features such as custom menus, calculators, filters, animations, form validation, and dynamic content.
Beginners should first become comfortable with the visual tools and Bootstrap components. You can then gradually introduce custom code as you learn more about front-end development.
Previewing and Testing the Website
Before publishing your website, test every page carefully.
Check that navigation links work, buttons lead to the correct locations, images load properly, and forms display correctly. You should also review the website at multiple screen sizes.
Bootstrap Studio provides preview options that allow you to view the design in a web browser. Testing in a real browser is important because it shows how the exported website will behave outside the editor.
You should also check spelling, page titles, headings, image alternative text, contact details, and overall loading speed.
Exporting and Publishing Your Website
When your website is ready, you can export the project. Bootstrap Studio generates the required website files and places them into an export folder.
The exported files usually include HTML pages, CSS stylesheets, JavaScript files, fonts, images, and other assets used by the project.
You can upload these files to your hosting account using a hosting control panel, file manager, FTP client, or deployment service.
Make sure the homepage file is named correctly, commonly `index.html`, and keep the exported folder structure unchanged. Moving files without updating their paths may cause missing styles, images, or scripts.

Tips for Bootstrap Studio Beginners
Start with a simple project such as a personal portfolio, landing page, service website, or small business homepage. Avoid trying to build a complex web application as your first project.
Use containers, rows, and columns correctly instead of relying on excessive margins or manual positioning. This will make your layouts more responsive and easier to manage.
Keep your design consistent by reusing the same color's, fonts, button styles, and spacing patterns.
Save your project regularly and create backup copies before making major changes.
Most importantly, study the generated HTML and CSS. Bootstrap Studio can speed up your work, but understanding the underlying code will help you become a better web designer and developer.
Final Thoughts
Bootstrap Studio is a powerful tool for anyone who wants to build modern, responsive websites more efficiently. Its drag-and-drop interface makes website creation approachable for beginners, while its code editing and export features provide flexibility for experienced users.
By learning how to use Bootstrap components, responsive grids, custom CSS, images, fonts, and website resources, you can create professional-looking websites without writing everything from scratch.
Bootstrap Studio should not completely replace learning HTML, CSS, and JavaScript. Instead, it can support the learning process by allowing you to design visually and examine how the final code is produced.
Start with a small website, experiment with different components, test your layouts on multiple screen sizes, and gradually add more advanced customisation. With regular practice, Bootstrap Studio can become an effective part of your web design workflow.